This page gives a little insight into the different stages I go through in making my instruments. It is still a work in progress.
Selecting the wood
I select all wood personally—using mainly spruce and maple. Some of the wood I have is around a hundred years old.
The timber used needs to have several specific requirements. First is has to be quarter cut, following the direction of the split line. This ensures that the wood is strong, more stable with humidity variations, and transmits sound waves as perfectly as possible. Ideally it wants to have a regular and fine growth, with the year rings widening slowly and regularly. It is ultimally a plus if on top of the acoustic and structural requirements, the maple also has an interesting and deep flame. The flame is certainly a stunning visual effect, but contrary to common belief is not a guarantee of acoustic qualities. It is caused by the fibres of the wood having a wavy structure, which, when planed flat, produces the flame. The wavier is the fibre, the deeper the flame will be.
As for the the spruce, I exclusively use split Italian spruce from the Dolomites region, usually the Fiemme Valley; the Pusteria Valley. It needs to be felled in winter, and grown above an altitude of 1200m. This ensures strength and low density.
For the maple I am more flexible, the bulk of my stock is Bosnian maple. I also have great Scottish sycamore, beautiful American red maple, and striking Romanian maple. I like to season and cure the maple for at least 10 years, the spruce for 5 years.
Making the model
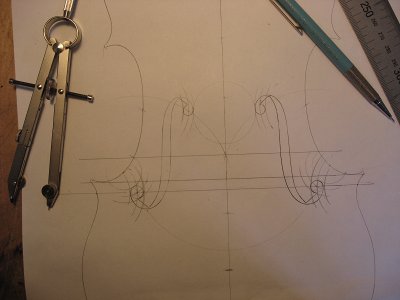 Thanks to Francois Denis and his enlightening work on proportions and drawing instruments, we can now all draw our own models with all the measurements in proportions. This has been a big step forward in the freedom makers now have to follow a more personal aestethic view, working within the same traditional and classic proportions and boundaries. I will never forget when in Oberlin a good few years ago, Francois showed us the development of the drawing for the scroll, explained to us the rotation of the square and finally superimposed the Amati scroll with it. It coincided perfectly, the audience gasped in amazement. It felt like when a detective solve a mistery, a truly exiting moment; finally someone was giving answers.
Once I have drawn the model, it is transferred onto the mould.
Building the ribs
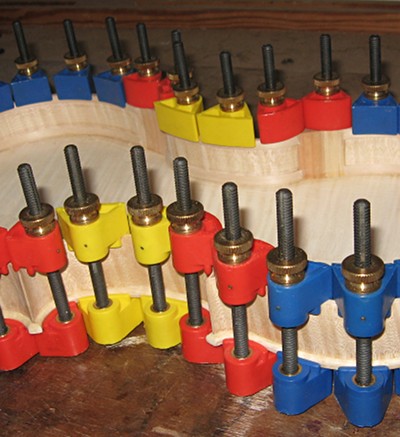 Willow blocks are now glued onto the mould. Strips of maple are evenly thinned to just over a millimetre with a plane and then a scraper. They are then damped, bent using a hot iron and a bending metal strap, and glued onto the blocks.
Linings, 2mm strips of willow, are then glued around the edges of the ribs, to strengthen the structure and increase the gluing surface between the ribs and the plates.
Cutting the top and bottom plates
After selecting a quarter cut wedge of wood to form one of the plates, it is reduced in thickness and roughly smoothed. Wood for the back and front plate is cut in half and centre-joined. One piece plates can be made, but are rarer as it requires a tree twice as wide.
The ribs are then traced around and the plates cut to shape. The edges of the plate are thinned down to close to their final thickness and the purfling is added—made from alternately stained and unstained maple.
Shaping and tuning the plates
This is where the most interesting part of the work begins, for me, and where most of my time and effort is spent—carving the plates to achieve the desired thickness and arching. It is the part of the craft that most determines the acoustic qualities of the instrument—and, while the aethetics are also crucial, most would agree that it is the quality of sound which truly distinguishes instrument.
Getting the carving correct, tuning the plates to specific frequencies, bringing their weight, resistance and flexibility into fine balance—this is the very heart of the craft of violin-making.
The curves in the plates’ cross-section is taken from precise gothic arches which combine form and function. It is a slow and careful process, and hours are spent carving, smoothing, tapping, bending, listening and touching. Although the patterns I work from are fixed and mathematical, this part of the process allows subtle variations to be made in order to get absolutely the best acoustic response from each piece of wood—a material with many natural variations in it. No machine could ever achieve this degree of fineness and subtlety of work.
F-hole placing
The placing of the F-holes is done on paper first, then transferred onto the wood, guided by the same traditional and natural mathematical patterns which shape the plates themselves. I believe that these proportions have a strong impact on how well the instrument works. If something is beautiful and balanced, it will work as well as possible.
The bass-bar
The bass bar position is crucial for the support on the bass and transmission of sound. I make it fit the internal arch with just a small amount of spring, as in my experience this gives optimal sound output. Once glued, its shape and size is reduced and finalized.
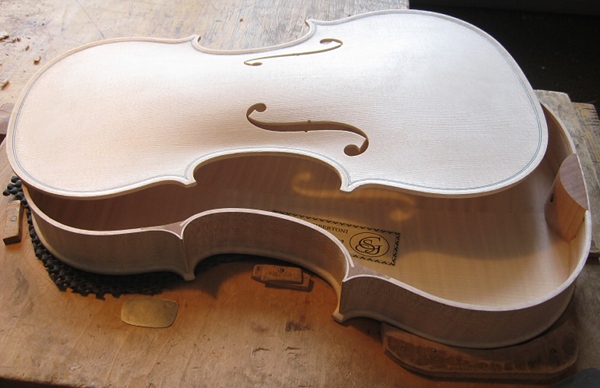
Finishing the body
Once the careful work of shaping the plates is complete, they are assembled with the ribs. The correct positioning of the bass-bar and sound post are critical to the strength of the instrument and the sound it produces.
Carving of the scroll
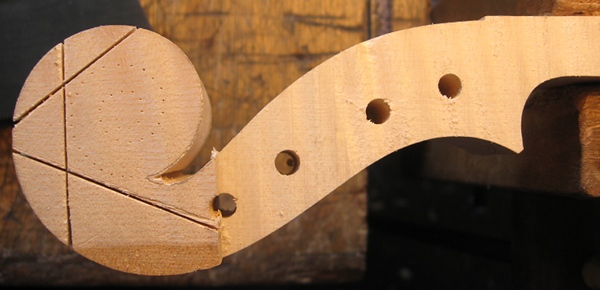
From a quarter cut piece of maple, the neck is roughly shaped with a series of diagonal cuts, to leave the scroll to be carved: this process is only done with gouges. The fingerboard is then carefully prepared and glued onto the neck, together with the top nut. The neck, fingerboard and top nut are then blended in together in their final shape.
Fitting of the neck
We now have the instrument in 2 pieces, the complete box and the neck with the fingerboard. Inserting the neck in the box is done with a dove tail joint, having to follow numerous measurements at once—it is a tricky operation and not for the faint hearted. The correct angle in which the neck is fitted in the box is very important for the sound.
Final testing and setting up
Once the instrument is completed, I always like to set it up in the white (without varnish). At this stage I am always eager to try them and I could not wait for the varnish procedure to be finished before having a go on them! I know the sound changes once the varnish is on, nevertheless you can have an idea of how it is going to sound, and some defects can be rectified at this stage.